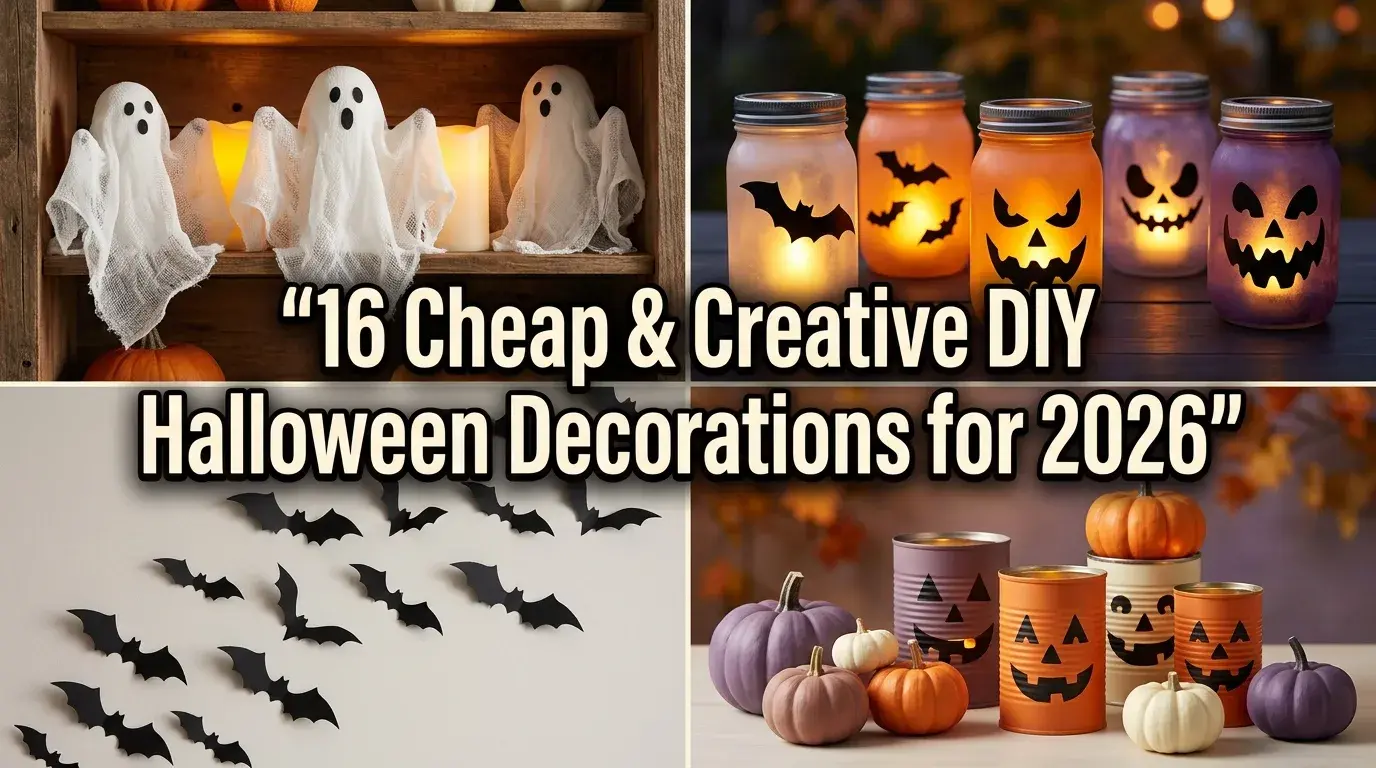
16 Cheap & Creative DIY Halloween Decorations for 2026
Halloween decorating can be fun, creative, and affordable without filling your shopping cart with expensive seasonal accessories. These cheap DIY Halloween decorations for 2026 turn everyday household items into charmingly spooky accents, helping you transform your porch, mantel, windows, and party table into a festive space that feels personal and welcoming.
Whether you love cute ghosts, creepy silhouettes, glowing lanterns, or rustic pumpkin displays, there are plenty of easy DIY Halloween decor ideas to explore. With recycled containers, inexpensive craft supplies, and a little imagination, you can create homemade Halloween decorations that look beautiful in photographs and bring plenty of personality to your seasonal decorating.
1. Floating Cheesecloth Ghosts for a Spooky Entryway
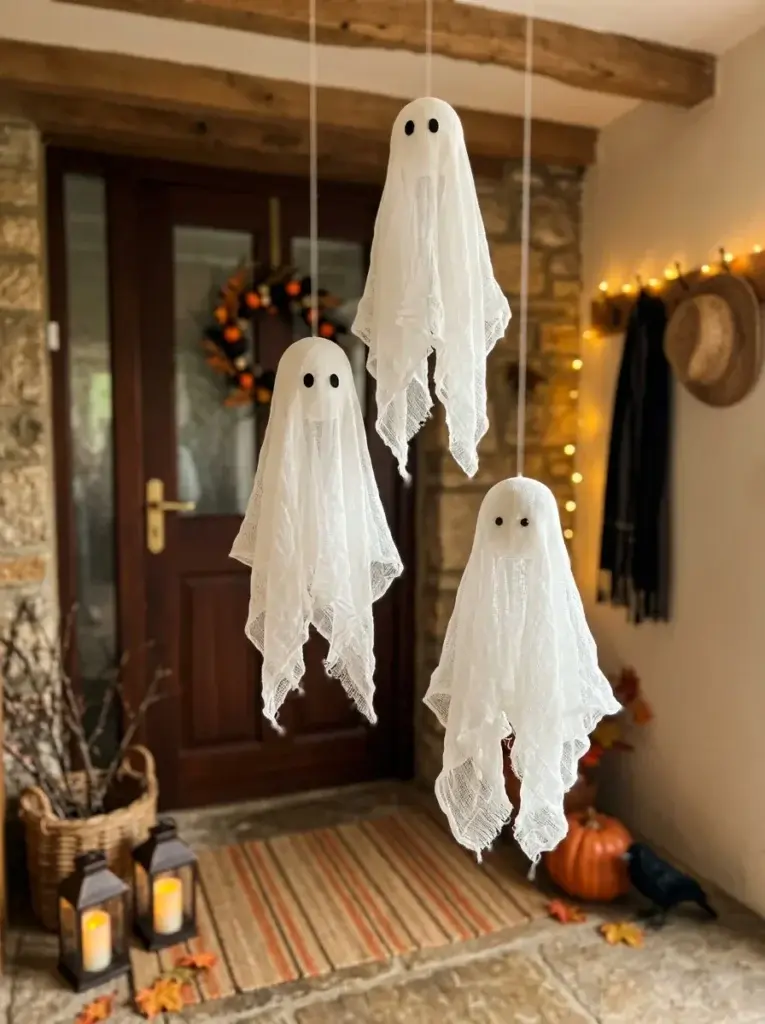
These floating fabric ghosts add a whimsical haunted-house atmosphere without requiring expensive store-bought decorations. Their airy white layers contrast beautifully with darker Halloween accents, making them ideal for entryways, mantels, shelves, or covered porches. Because their shapes remain simple, they suit both playful family displays and more sophisticated seasonal decorating.
To make them, drape inexpensive cheesecloth over lightweight foam balls or crumpled paper supported by sticks, then secure the fabric with string. Adjust the folds to create flowing silhouettes and attach small black paper eyes. Hang each ghost with clear thread, spacing them at different heights for a convincing floating effect.
Professional Tip: Use lightweight LED lighting nearby to emphasize the fabric’s transparency, and secure hanging decorations away from ceiling fans, heaters, and open flames.
2. Eerie Glow Mason Jar Lanterns
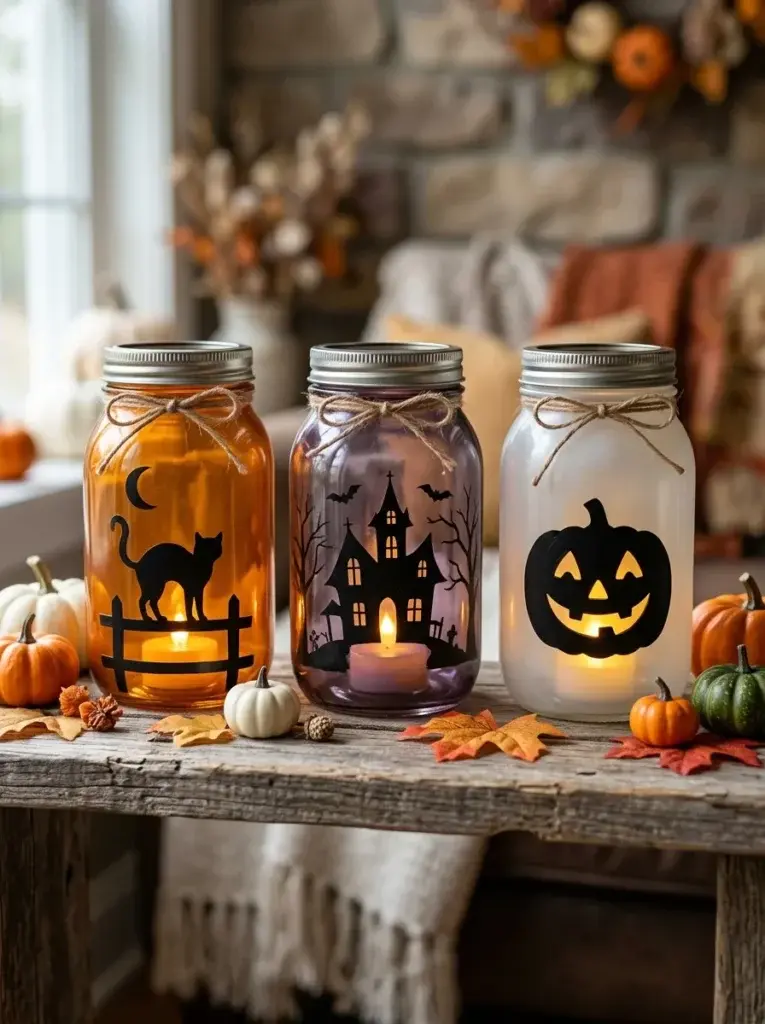
Mason jar lanterns turn ordinary glass containers into inexpensive Halloween accents with a lovely glow. Their translucent colors and silhouetted designs create an atmospheric display for windowsills, dining tables, and covered porches. This project is especially appealing when you want coordinated decorations without buying an entire matching set from a seasonal store.
Clean empty jars thoroughly, then apply translucent glass paint or tissue paper with suitable craft adhesive. Add cutout silhouettes to the outside and place battery-powered LED tealights inside. Experiment with different jar sizes, colors, and shapes to create a layered arrangement that looks attractive during daylight and becomes more dramatic after sunset.
Professional Tip: Choose battery-operated lights rather than real candles, and keep painted or paper-covered jars away from excessive heat.
3. Black Paper Bat Wall Installation
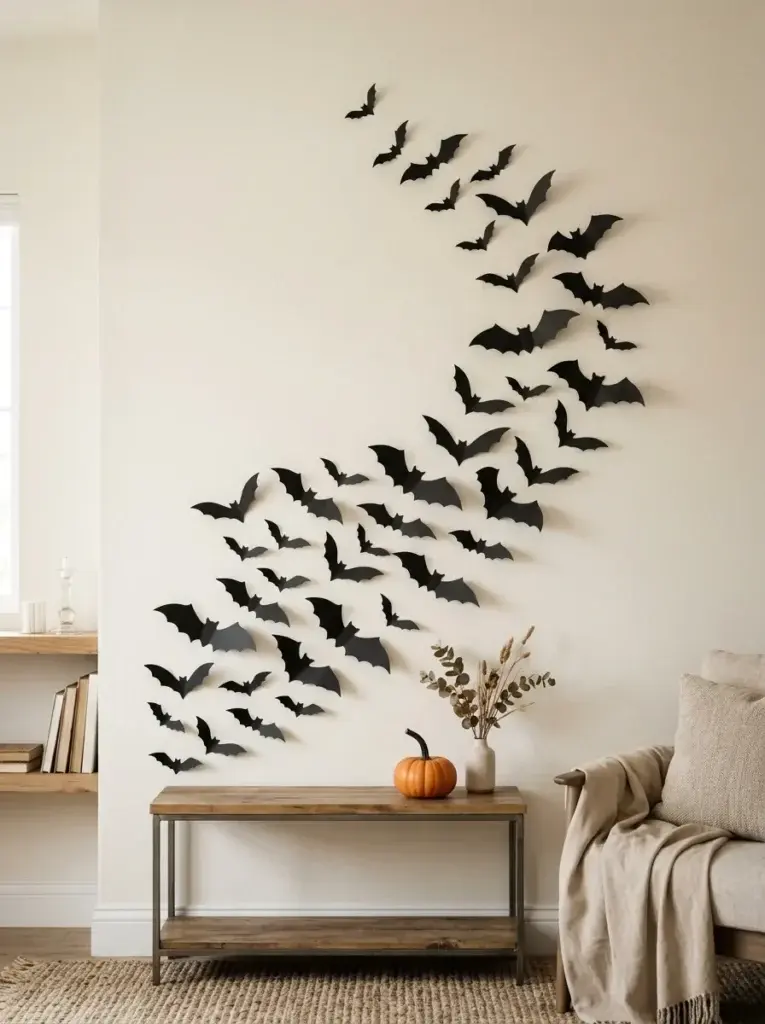
A flock of paper bats creates an eye-catching Halloween statement using materials that are inexpensive and easy to find. The black silhouettes stand out against light walls, instantly making an ordinary room feel festive. This decoration works particularly well in hallways, above fireplaces, or around doorframes where the pattern can spread naturally.
Draw several bat shapes on black cardstock, cut them out, and gently fold their wings to add dimension. Attach the shapes with removable adhesive suitable for your wall surface, beginning with a loose curve and filling gaps gradually. Vary the angles and spacing so the finished arrangement looks like a moving flock rather than a rigid pattern.
Professional Tip: Make a few reusable cardstock templates first so your bats look coordinated without becoming identical.
4. Mini Pumpkin Tin-Can Lanterns
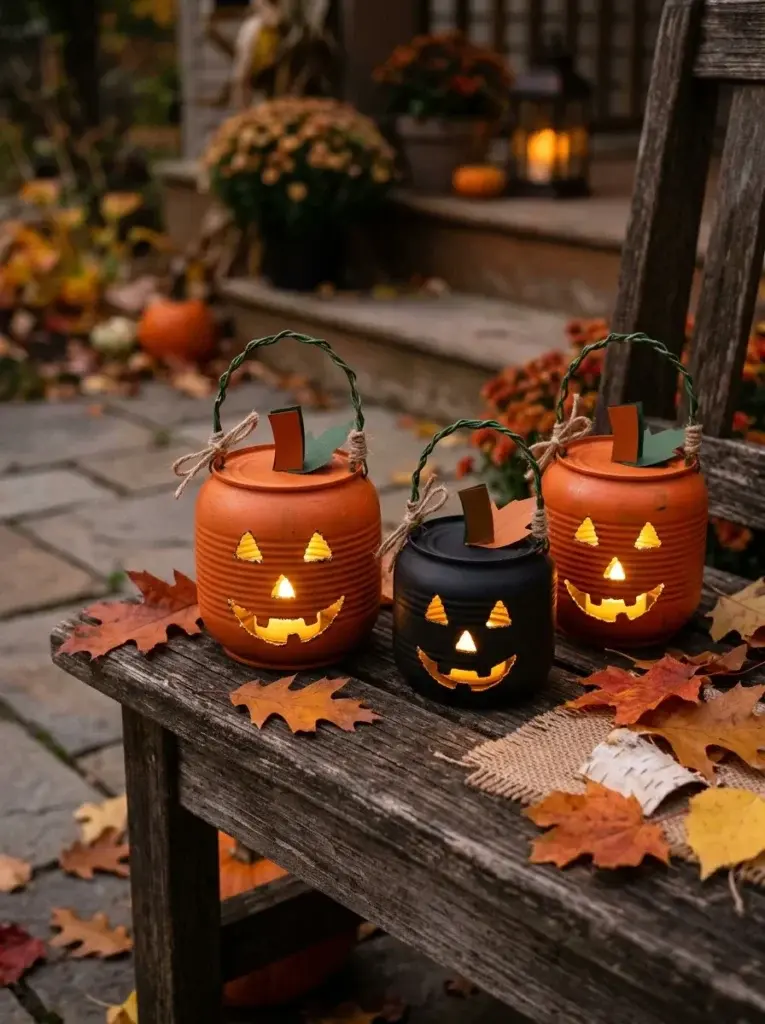
Recycled tin-can lanterns offer a creative way to give empty food containers a second life. Their punched faces cast playful patterns of light, making them suitable for porch displays, windowsills, or Halloween party tables. A little paint transforms basic metal into festive pumpkin-inspired decor that complements other inexpensive homemade decorations.
Wash the cans thoroughly, remove labels, and ensure the rims are safe to handle. With adult supervision, make small holes using a suitable tool, then paint the cans orange or black. Once dry, add battery-operated lights inside and attach simple stems made from paper or craft materials for a finished pumpkin appearance.
Professional Tip: Freeze a can filled with water before punching holes to help support its walls, and have an adult handle all sharp tools.
5. Friendly Toilet Paper Roll Mummies
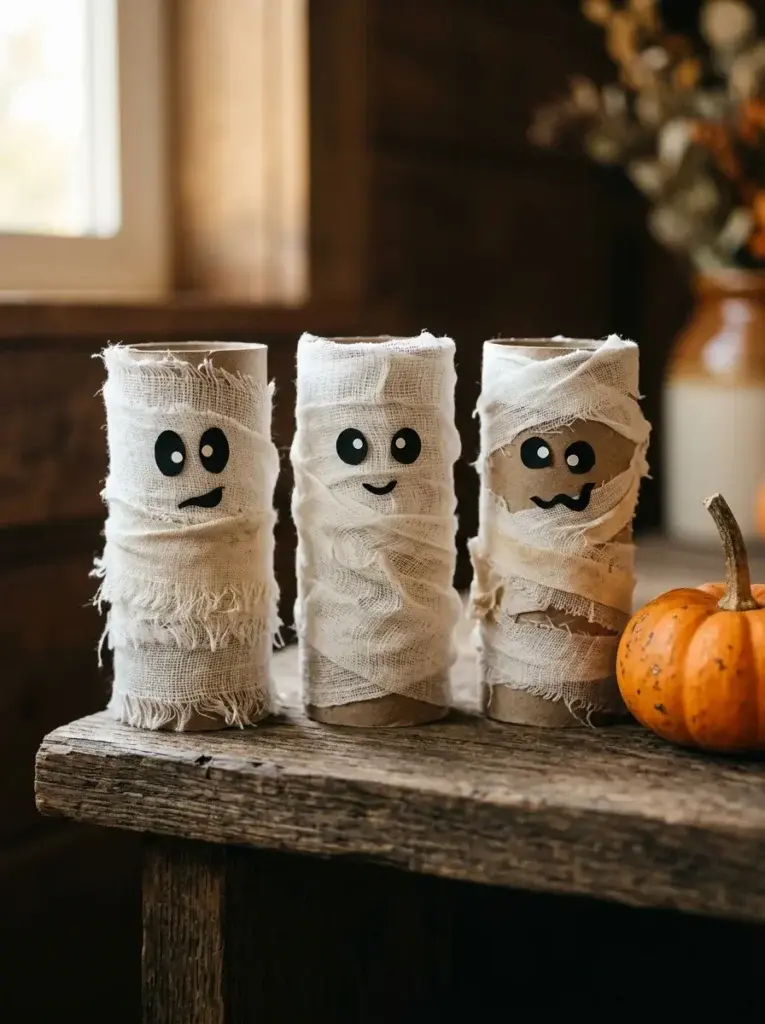
These little mummies bring a playful Halloween touch to shelves, desks, and party tables without demanding much time or money. Their simple shapes and slightly messy bandages create plenty of character, while their neutral white finish coordinates easily with orange pumpkins, black paper bats, and other homemade Halloween decorations.
Collect empty cardboard rolls and wrap them with inexpensive gauze, white fabric scraps, or narrow strips of tissue paper. Secure the ends with craft glue, leaving small gaps where the eyes can peek through. Arrange several mummies together, varying their heights and expressions, or place them beside candy bowls for a cheerful seasonal display.
Professional Tip: Use a small amount of adhesive between fabric layers so the bandages stay in place without becoming stiff or bulky.
6. Rustic Halloween Potion Bottles
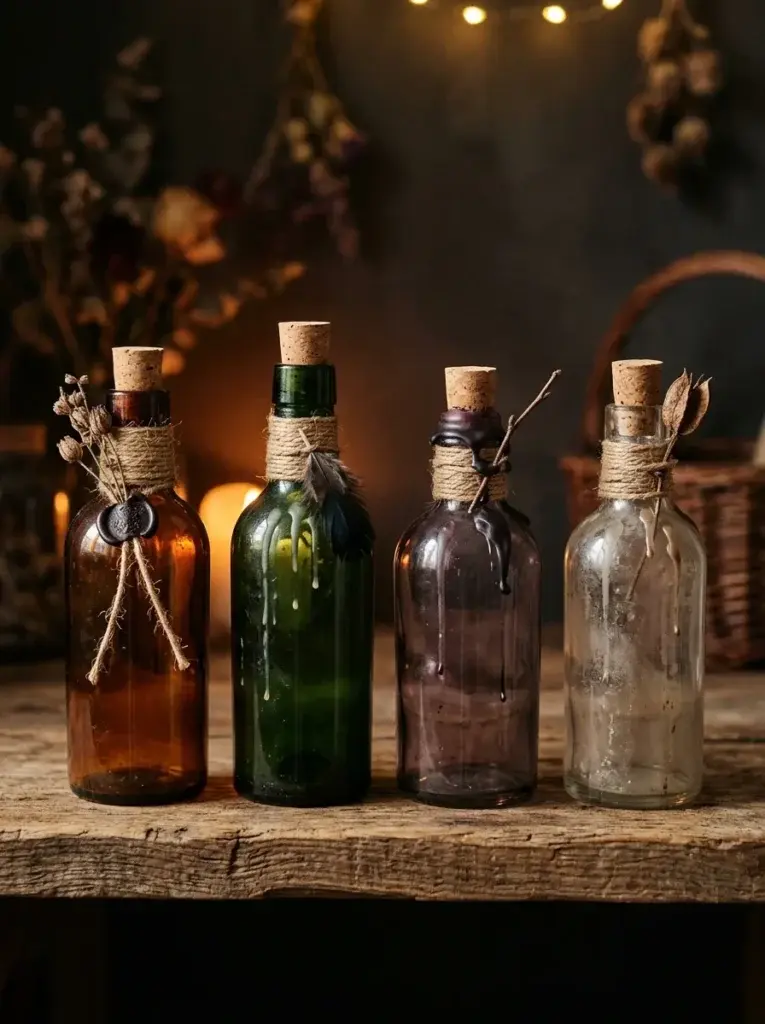
Empty glass bottles can become atmospheric potion props that give bookshelves and Halloween tables a mysterious, old-world appearance. Their varied shapes and jewel-toned colors make the collection feel thoughtfully curated, while recycled containers keep the project affordable. These decorations are especially effective when grouped with old books, miniature pumpkins, or dark fabric.
Wash and dry the bottles, then tint them with suitable glass paint or decorate their exteriors with translucent tissue paper. Add corks, twine, and small decorative details to complete the vintage look. Display the bottles together in odd-numbered groups, mixing heights and colors to create a visually balanced arrangement without overcrowding the surface.
Professional Tip: Keep decorative bottles clearly separate from actual beverages, and avoid placing small loose embellishments where young children could swallow them.
7. Floating Witch Hat Ceiling Display
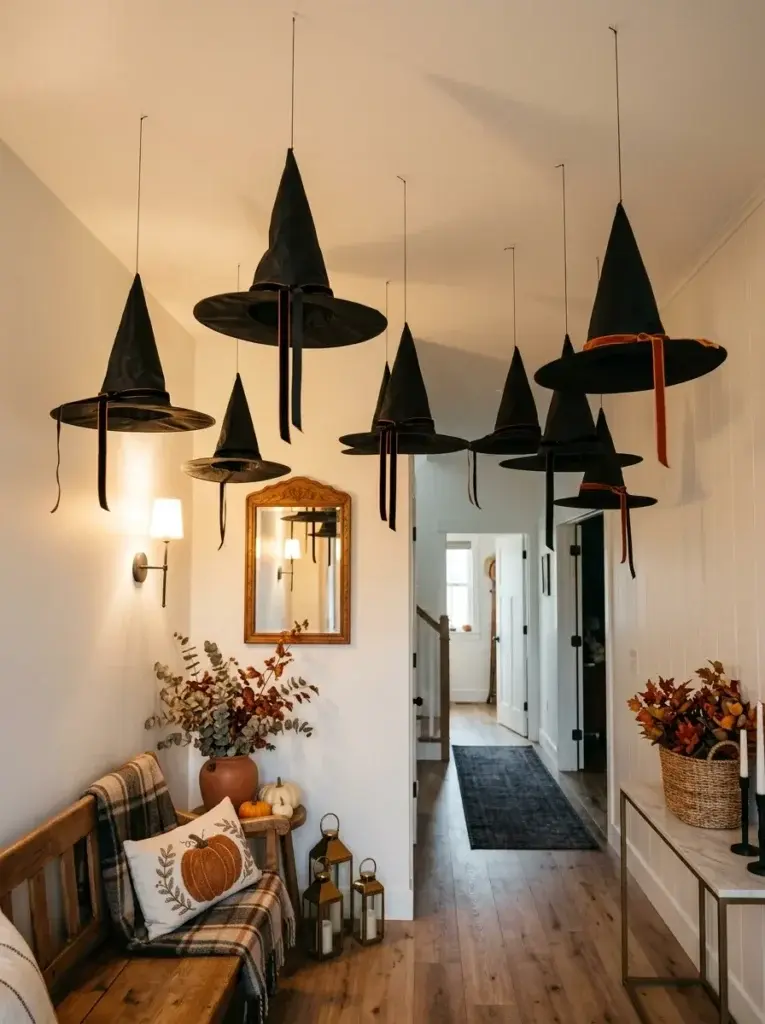
Floating witch hats create a magical Halloween effect that immediately draws the eye upward. Unlike bulky floor decorations, they use vertical space, making them especially useful in smaller homes or apartments. Their simple black silhouettes work with traditional orange-and-black themes as well as more understated displays featuring ivory, wood, and warm lighting.
Use inexpensive lightweight costume hats, attach clear thread securely near each crown, and suspend them from suitable ceiling hooks. Arrange the hats at varying heights, leaving enough clearance for people to walk underneath comfortably. For a more coordinated look, combine a few hat sizes and keep surrounding decorations minimal so the floating arrangement remains the main attraction.
Professional Tip: Check ceiling materials before attaching hooks, and never suspend decorations near ceiling fans, sprinklers, or light fixtures that become hot.
8. Spooky Window Silhouettes
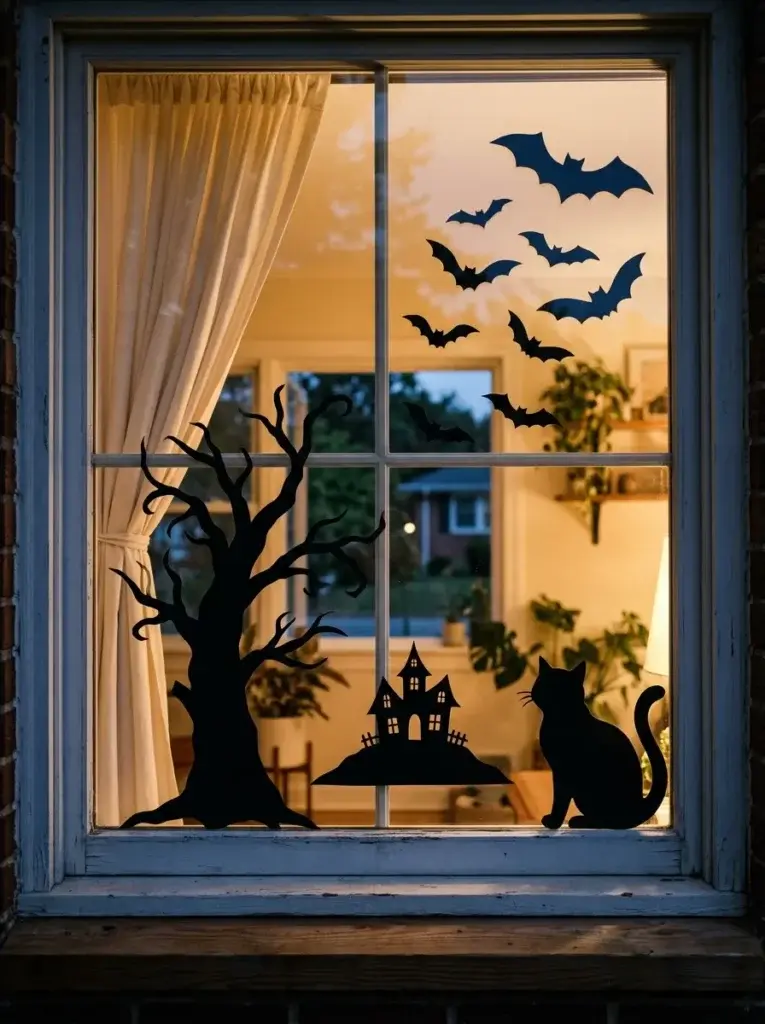
Window silhouettes are an affordable way to make Halloween decorations visible from inside and outside your home. Their dramatic contrast looks especially appealing after sunset, when indoor lighting reveals the shapes against the glass. This project can create a haunted-house atmosphere without filling the room with extra props or taking up valuable floor space.
Sketch recognizable Halloween shapes onto black cardstock and cut them out carefully with scissors. Attach the silhouettes to clean glass using removable, window-safe adhesive, arranging larger shapes near the corners and smaller bats around them. Before decorating multiple windows, test the adhesive on a small area and make sure the display does not obstruct important views.
Professional Tip: Use simple silhouettes with clear outlines; intricate details may disappear when viewed from across the street.
9. DIY Spiderweb Hoop Decorations
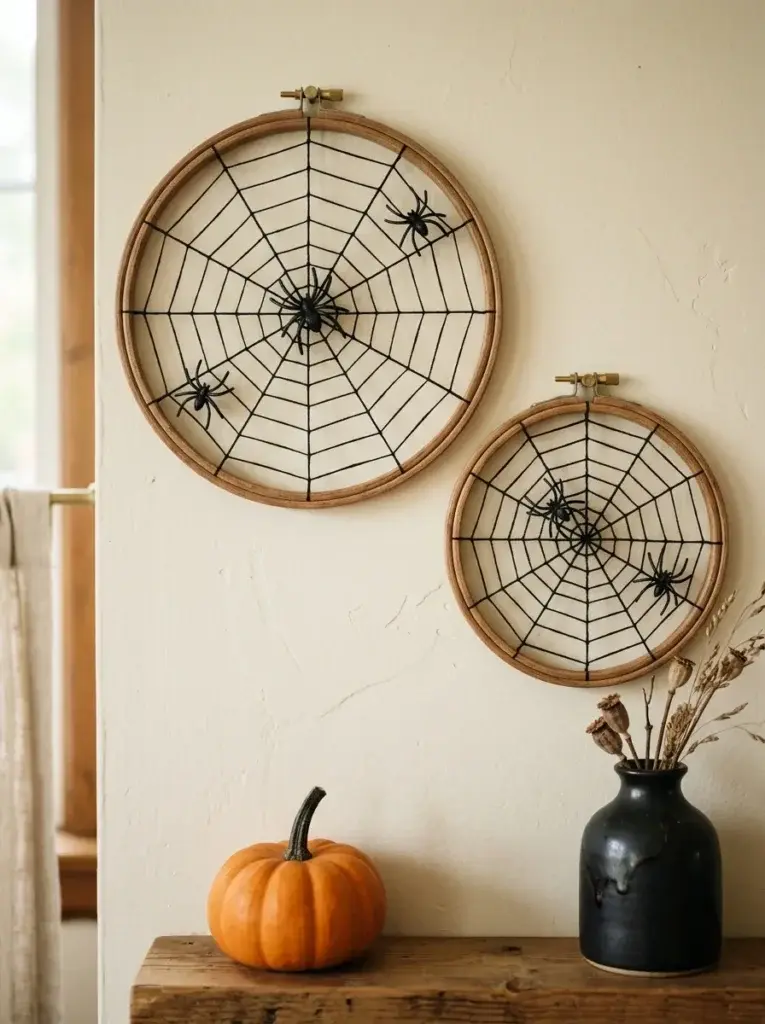
Spiderweb hoop decorations provide a neat, handmade alternative to loose synthetic cobwebs. The circular frames give the design a polished appearance, while the black thread creates a spooky contrast against pale walls. Because the hoops can be reused, this inexpensive craft is a practical choice for anyone building a collection of homemade Halloween decorations.
Place a few straight threads across an embroidery hoop, securing them tightly to form the web’s spokes. Weave additional thread around the spokes in expanding circles, tying it securely at intervals. Add a small decorative spider if desired, then hang the finished hoop alone or combine several sizes into a coordinated wall arrangement.
Professional Tip: Keep thread tension consistent as you weave so the finished web stays centered instead of sagging toward one side.
10. Painted Dollar-Store Pumpkin Makeover
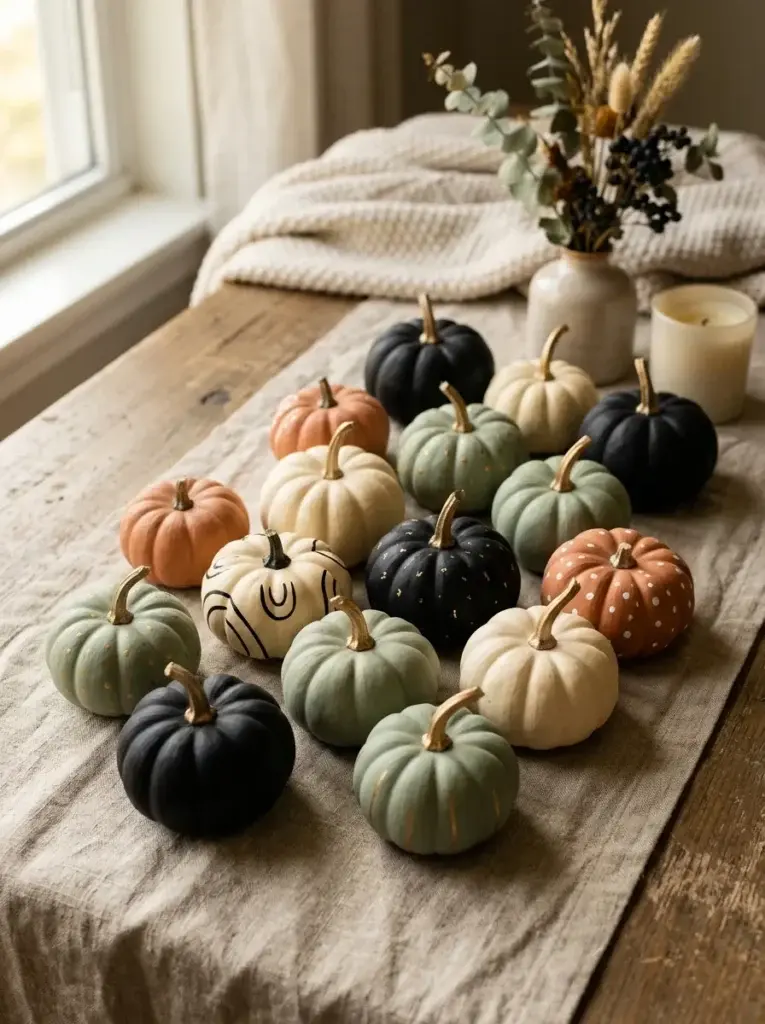
Painted pumpkins offer an easy way to coordinate Halloween decor with your existing home style. A simple color makeover can make inexpensive seasonal pumpkins feel more intentional, whether you prefer classic spooky colors or a softer neutral palette. Their compact size also makes them ideal for shelves, coffee tables, dining centerpieces, and small apartment displays.
Wipe each faux pumpkin clean and let it dry before applying a suitable primer if needed. Add two thin coats of craft paint, allowing each layer to dry completely. Finish with a contrasting stem or a few hand-painted details, then group the pumpkins by color or size to create an attractive seasonal arrangement.
Professional Tip: Apply several thin coats instead of one thick layer to reduce visible brush marks and preserve the pumpkin’s molded details.
11. Black Cat Cardboard Silhouette
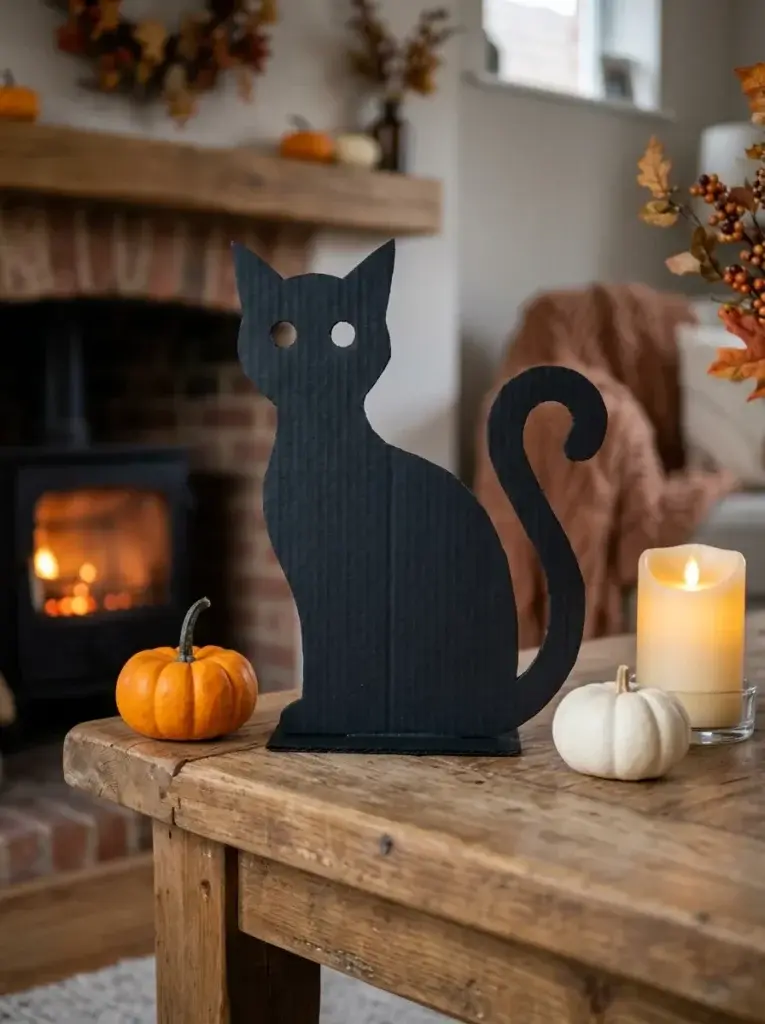
A black cat silhouette adds a classic Halloween detail without requiring special crafting equipment. Its recognizable outline creates a playful spooky accent for mantels, shelves, and entry tables. Using recycled cardboard keeps the project inexpensive, and a matte-black finish helps the finished piece look coordinated with other homemade Halloween decorations.
Draw a sitting cat with pointed ears and a curved tail onto sturdy cardboard, then cut around the outline carefully. Paint both sides black and allow them to dry before adding a simple cardboard support to help the cat stand upright. For a wall version, leave off the support and use removable mounting strips.
Professional Tip: Keep the tail and legs connected to the main silhouette with sturdy cardboard sections to prevent delicate parts from bending or breaking.
12. Halloween Book Page Ghost Garland
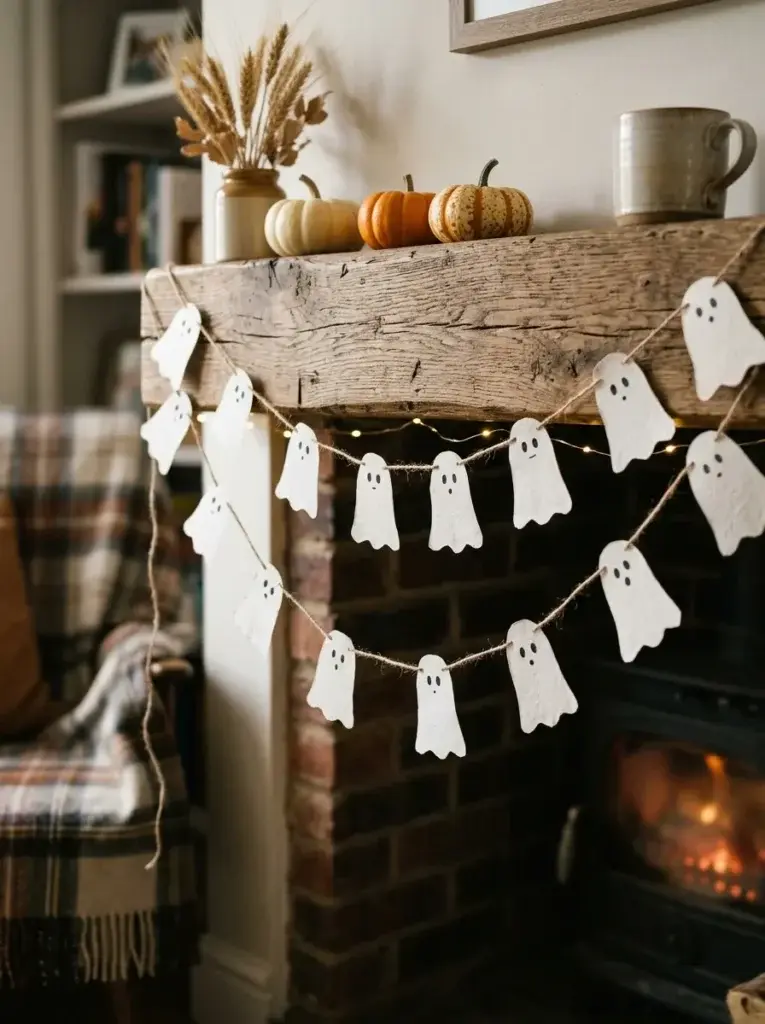
A paper ghost garland brings a lighthearted Halloween touch to mantels, shelves, and party backdrops. Its soft white shapes contrast beautifully with dark furniture and autumn-colored accents, while recycled paper makes it a budget-friendly decorating choice. The finished garland is lightweight, easy to store, and simple to customize for different spaces.
Trace a basic ghost shape onto plain paper or unused book pages, then cut out enough pieces to create your desired garland length. Add small black eyes and attach each ghost to cotton twine with glue or small clips. Space the pieces evenly, then hang the garland securely above a mantel or along an indoor shelf.
Professional Tip: If you use old book pages, choose damaged or unwanted books rather than cutting up a volume you would prefer to preserve.
13. DIY Egg Carton Spiders
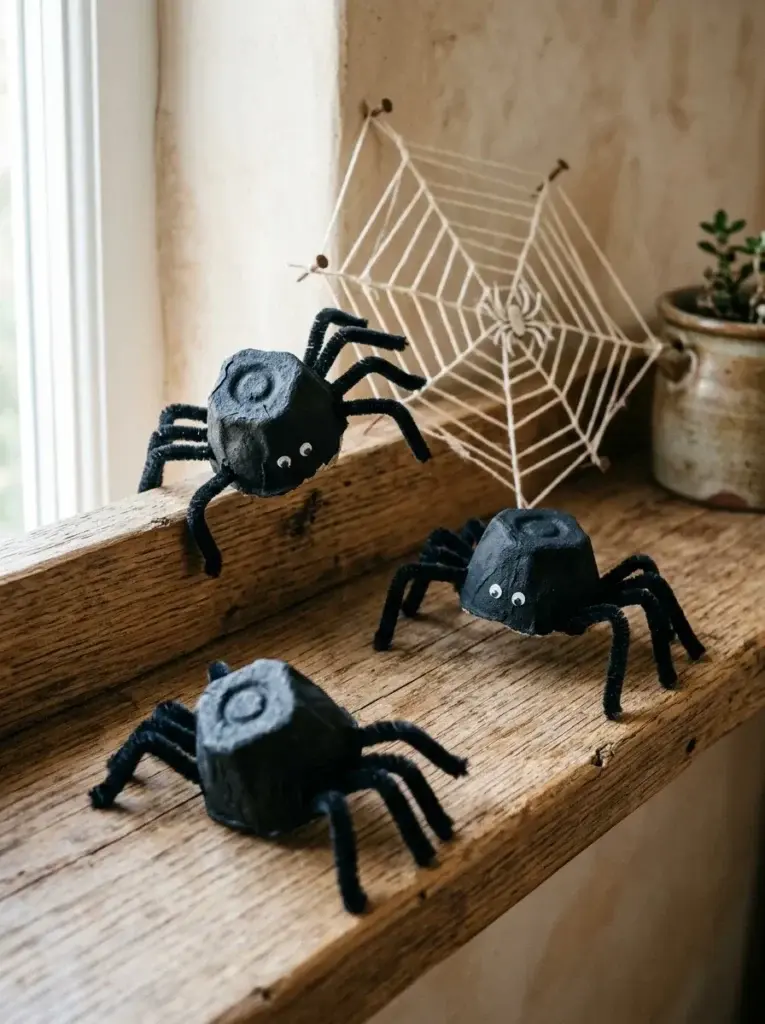
Egg-carton spiders are an inexpensive way to add small spooky details to shelves, party tables, and Halloween craft displays. Their rounded bodies and bendable legs make each spider easy to personalize, while recycled packaging keeps the materials simple. They can look playful rather than frightening, making this project suitable for family-friendly seasonal decorating.
Cut individual cups from a clean cardboard egg carton and trim their edges into rounded shapes. Paint each body black, allow it to dry, and attach pipe-cleaner legs on both sides. Add eyes using small craft pieces, then bend the legs into natural positions and arrange the finished spiders near a paper web.
Professional Tip: Trim rough cardboard edges before painting so the spiders have a cleaner finish, and keep small parts away from young children.
14. Rustic Halloween Branch Centerpiece
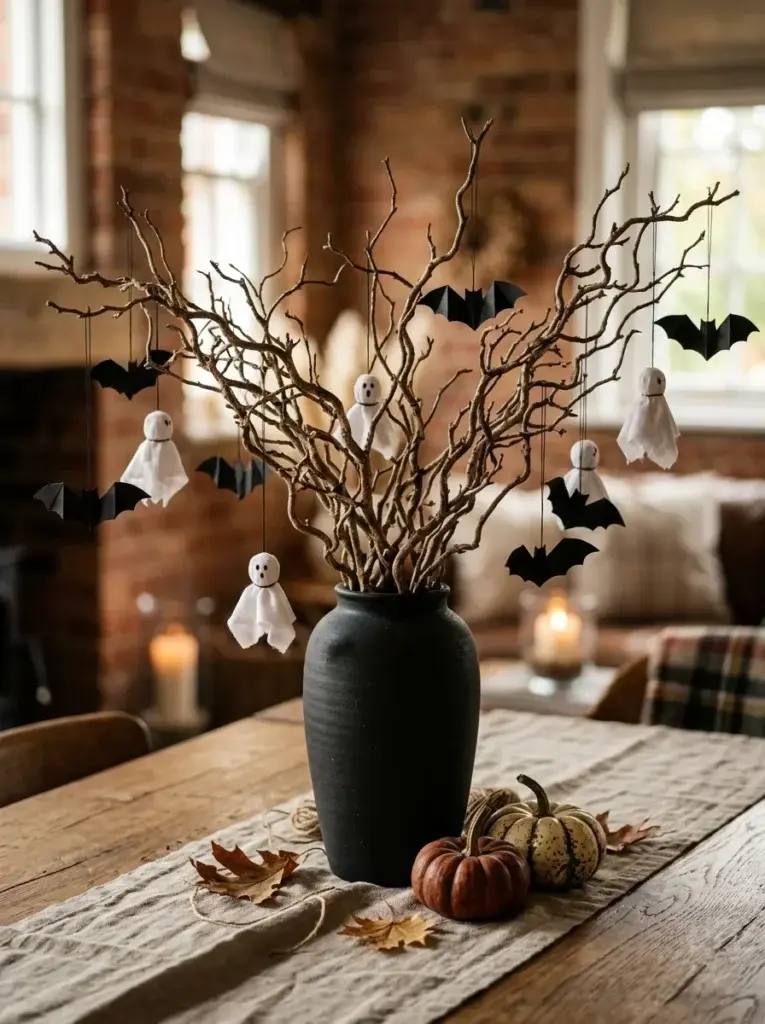
A Halloween branch centerpiece creates height and visual interest without requiring an expensive floral arrangement. The natural branches provide a rustic backdrop for lightweight paper decorations, while the black vase ties everything together. This versatile idea works on dining tables, sideboards, and entry consoles, especially when you want seasonal decor that leaves enough room for everyday use.
Collect clean, dry branches that fit your chosen container, checking that they are sturdy and free of insects. Place them in a stable vase, then suspend lightweight paper bats or tiny ghosts using thread. Adjust the branches and hanging decorations until the composition looks balanced, and add a few pumpkins nearby if you want extra autumn color.
Professional Tip: Choose a wide, stable container and secure the branches with clean stones or another suitable weight so the centerpiece cannot tip easily.
15. DIY Halloween Candy Bowl with Mummy Wrapping
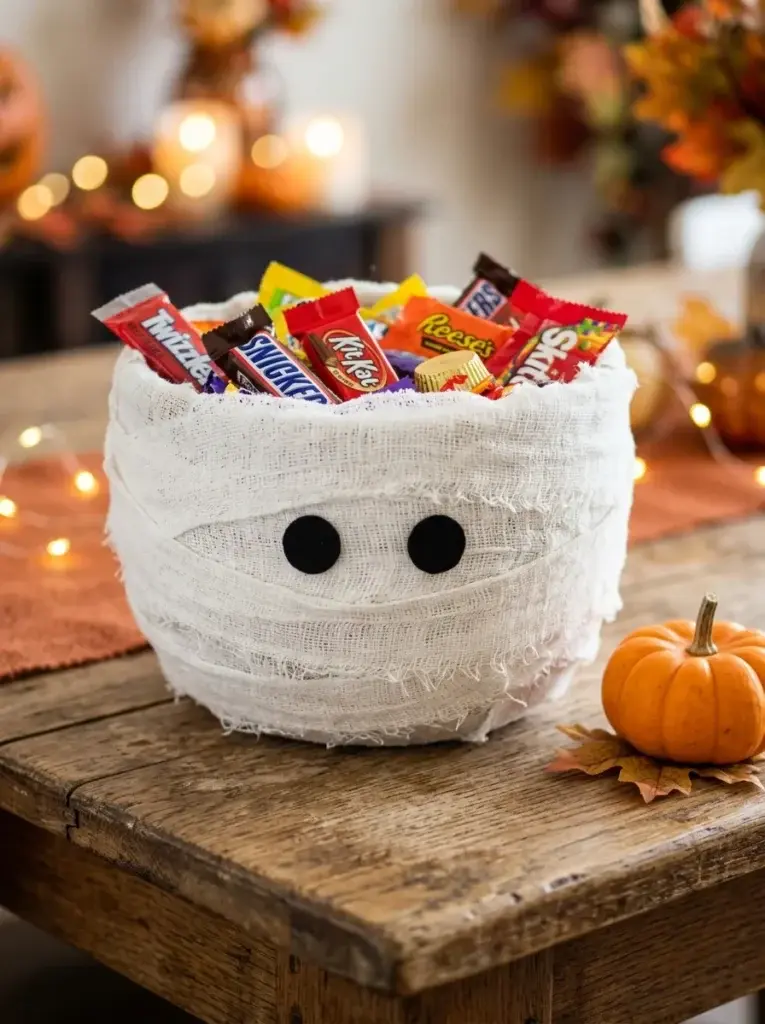
A mummy candy bowl combines useful party decor with a simple handmade Halloween design. Its wrapped white exterior and friendly eyes give an ordinary container a festive makeover, while the open top keeps treats easy to reach. This project is especially practical for gatherings because it decorates the table while serving a purpose.
Choose a clean, lightweight bowl with a smooth exterior and wrap its outside with gauze or white fabric strips. Secure the ends with craft adhesive, keeping glue away from the food-contact surface. Attach two eyes to the front and allow everything to dry before filling the bowl with individually wrapped candies.
Professional Tip: Use a separate food-safe liner or an untouched inner bowl if the wrapping materials or adhesive could come into contact with the candy.
16. DIY Halloween Wreath with Recycled Fabric
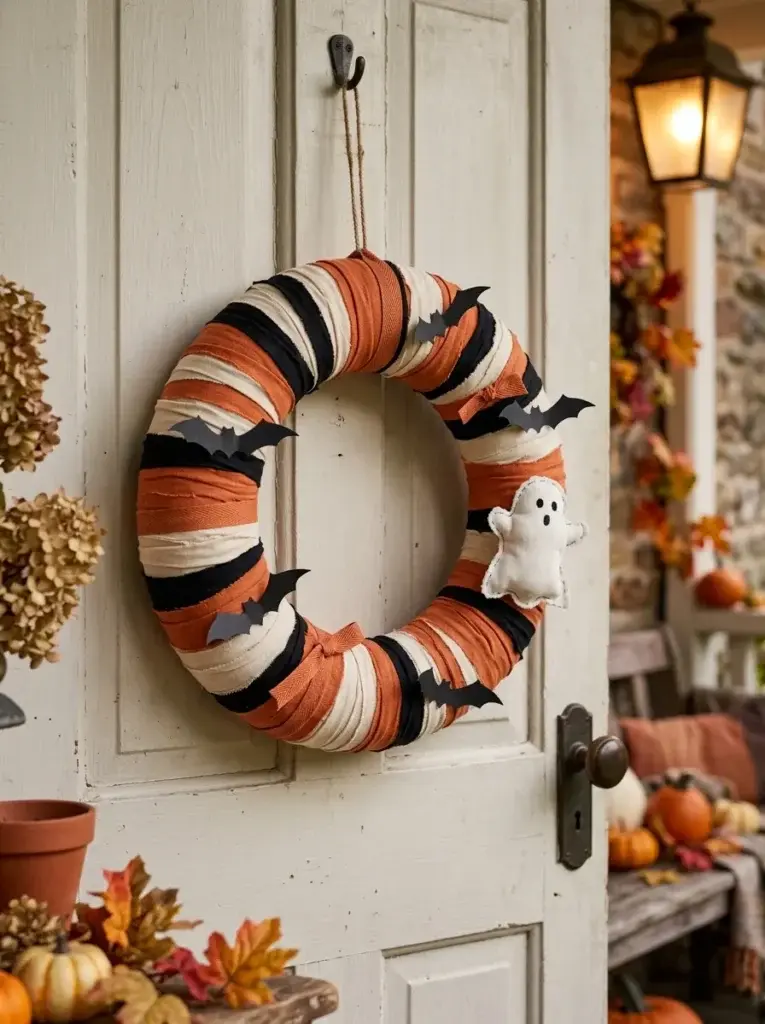
A fabric-wrapped Halloween wreath creates a welcoming seasonal focal point without the expense of a ready-made arrangement. Its soft textures and familiar Halloween colors give the front door a festive appearance, while recycled fabric and cardboard help keep the project affordable. The design can also be adapted to match rustic, minimalist, or playful decorating styles.
Cut a sturdy cardboard ring and wrap it with strips of old fabric, securing the ends with craft glue. Layer contrasting colors to create visual interest, then attach lightweight paper bats, a small fabric ghost, or a ribbon bow. Add a secure hanging loop and display the wreath on a protected door or inside an entryway.
Professional Tip: Keep the wreath lightweight and use a weather-resistant hanging method if displaying it outdoors, especially where wind or rain is common.
Frequently Asked Questions About DIY Halloween Decorations for 2026
1. What are the cheapest DIY Halloween decorations to make?
Some of the cheapest DIY Halloween decorations include paper bats, cardboard mummies, recycled jar lanterns, egg-carton spiders, and fabric ghost garlands. These projects use everyday materials and basic craft supplies. Before shopping, check your recycling bin and craft drawer for items you can reuse or transform.
2. How can I make Halloween decorations with household items?
Look for empty jars, cardboard boxes, egg cartons, old fabric, paper, and tin cans around your home. With paint, scissors, glue, and string, you can turn these materials into homemade Halloween decorations. Choose projects that suit your available supplies, and reuse leftover materials whenever possible.
3. What are some easy DIY Halloween decorations for beginners?
Beginners can start with paper bat wall displays, painted mini pumpkins, toilet paper roll mummies, and simple Halloween garlands. These crafts require few materials and offer plenty of room for personalization. Follow straightforward steps, allow paint and glue to dry fully, and begin with smaller projects before attempting elaborate displays.
4. How can I decorate my home for Halloween on a budget?
Choose two or three Halloween colors and repeat them throughout your home for a coordinated appearance. Make decorations from recycled materials, focus on visible areas such as entryways and mantels, and combine handmade accents with items you already own. Reusing decorations annually also helps reduce seasonal spending.
5. How early should I start making DIY Halloween decorations?
Starting in September gives you several weeks to plan, gather recycled materials, and complete your favorite DIY Halloween decorations before October 31. Begin with larger projects that need drying time, then add smaller crafts closer to Halloween. Early preparation also leaves room to repair, customize, and arrange your finished decorations.
Conclusion
Creating a festive Halloween home does not require a big decorating budget. These 16 cheap DIY Halloween decorations offer creative ways to transform everyday materials into memorable seasonal accents. Choose projects that match your style, gather your supplies, and start crafting. Save this article to Pinterest for inspiration throughout Halloween 2026!